
Showing posts with label Windows Server. Show all posts

How to Remove Internet Explorer from Windows Computers and Servers

Thursday, January 19, 2023

Support for Internet Explorer 11 ended on June 15, 2022 and IE 11 will no longer be accessible after February 14, 2023.

Even so, Internet Explorer 11 is still installed as the default web browser with every version of Windows and Windows Server. To make matters worse, Windows 10 also shipped with non-Chromium Edge (now called Legacy Edge). You'll need to download and install a "modern" web browser, such as Microsoft Edge, Google Chrome, FireFox, etc. Keep in mind that you can reload Internet Explorer sites with IE mode in Microsoft Edge.

Even with ChrEdge (my name for Chromium Edge) installed as the default web browser, I've heard from a few customers that IE is still being used for some web work flows. For example, a customer recently showed me this MFA security confirmation prompt that is opening in IE for some reason.
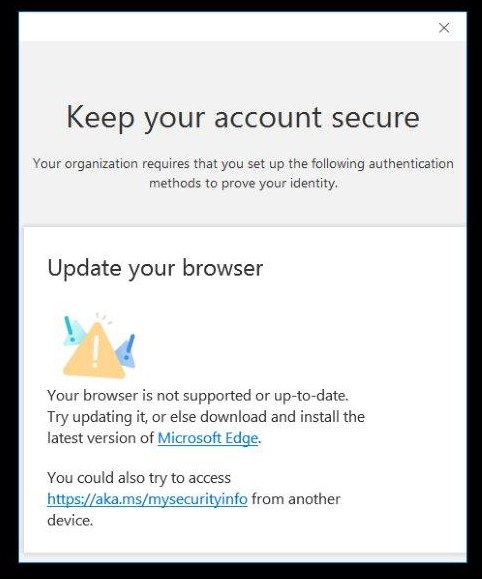

All this leads me to the task at hand. How do you uninstall Internet Explorer 11 from Windows?

This is not straight forward since IE 11 is part of the Windows installation. It cannot be removed as a Windows application or feature. The answer is to use DISM (Deployment Imaging Servicing Management) installed with all versions of Windows and Windows Server.

Run the following command from an elevated CMD or PowerShell prompt:

C:\Windows\System32\dism.exe /online /Disable-Feature /FeatureName:Internet-Explorer-Optional-amd64

Removal only takes a few seconds and the output looks like this:
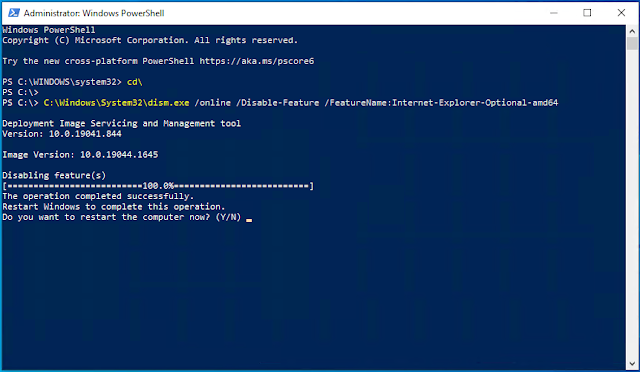

DISM will prompt you to restart the computer to complete the operation. Until you do, Internet Explorer will still show as an available web browser. Optionally, you can add the /Quiet switch which will not show DISM uninstall progress and will automatically restart the computer when it's done.

Read more ...

How to Enable Autologon for Domain-Joined Windows Servers and Workstations

Tuesday, April 29, 2008

Update: I've confirmed that the following procedures also work for all versions of Windows and Windows Server.

In a previous post I showed how to enable Autologon for workgroup servers and workstations.

Once you join a server to a domain, Windows will automatically delete the AutoAdminLogon value from the HKLM\SOFTWARE\Microsoft\Windows NT\CurrentVersion\Winlogon registry key. This causes the userpasswords2 control to hide the "Users must enter a user name and password to use this computer" check box shown above.

Here's how to get the missing checkbox back and configure AutoLogon:
  • Open an elevated CMD prompt and enter the following (all on one line):
reg add "HKLM\SOFTWARE\Microsoft\Windows NT\CurrentVersion\Winlogon" /v AutoAdminLogon /t REG_SZ /d "1" /f
  • Click Start, Run and enter control userpasswords2
  • Clear the checkbox for Users must enter a user name and password to use this computer and click OK
  • Enter the user name and password that will be used for automatic logon and click OK
You may find that you need to configure the default domain, as well.  If so, enter the following (all on one line) at an elevated CMD prompt:
reg add "HKLM\SOFTWARE\Microsoft\Windows NT\CurrentVersion\Winlogon" /v DefaultDomainName /t REG_SZ /d %USERDOMAIN% /f
When the computer starts up the account you specified will be logged in automatically.  Note that the password is encrypted on the computer.

This tip works for all versions of Windows desktops and servers.

Since you're here, be sure to check out my article about building a super-fast Windows Hyper-V lab server for under $1,000!

Read more ...

How to Enable Autologon for Windows Workgroup Servers and Computers

Tuesday, March 4, 2008


Update: I've confirmed that the following procedures work for all versions of Windows and Windows Server. 

Click here for instructions for enabling AutoLogon for Windows Server member servers and member workstations.

There may be times that you want/need to enable Autologon for Windows computers and servers.  Examples may be lab machines or kiosks.  Here's how to do it:
  • Click Start Run and enter control userpasswords2
  • Clear the checkbox for Users must enter a user name and password to use this computer and click OK. If this checkbox is missing, see my article about enabling AutoLogon on member servers and workstations.
  • Enter the user name and password that will be used for Automatic Logon and click OK
When the computer starts up the account you specified will be logged in automatically. Note that the password is encrypted on the computer.

This tip works for all versions of Windows and Windows Server.

Since you're here, be sure to check out my article about building a super-fast Windows Hyper-V lab server for under $1,000!

Read more ...