Is Azure AD Pass-Through Authentication Right for You?

Friday, December 9, 2016
Microsoft just released the new Azure Pass-Through Authentication and seamless Single Sign On option available in the new Azure AD Connect. This new authentication mechanism has a lot of great features and is well thought out, but it's not for every organization.

Check out my article, Microsoft Releases Azure AD Pass-Through Authentication and Seamless Single Sign-on, on the ENow Exchange & Office 365 Solutions Engine Blog. In it, I explain what PTA is, how it works, and how to configure it. You will learn how to deploy additional AAD pass-through connectors for high availability and configure SSO. I also discuss why AD FS may be a better solution for your business.


Additional resources:
Read more ...

How to Manage Distribution Groups from Office 365 in a Hybrid Environment

Wednesday, November 30, 2016
When on-premises distribution groups are synced to an Office 365 tenant via Azure Active Directory Connect, migrated users who are owners of the distribution group can't manage them in Outlook. Depending on the version of Outlook used, the user will receive an error message that resembles the following:
The action 'Update-DistributionGroupMember', 'Identity.Members', can't be performed on the object '<name>' because the object is being synchronized from your on-premises organization. This action should be performed on the object in your on-premises organization.

-or-
Changes to the public group membership cannot be saved. You do not have sufficient permission to perform this operation on this object.


This happens because Outlook tries to update the same directory where the user's mailbox exists. If the mailbox is in Exchange Online this is the Exchange Online Directory Service (EXODS) directory, which syncs with Azure AD. Since EXODS is read-only in a hybrid environment using AAD Connect, the user receives the error.


Read more ...

Fix for Performance Counter Updating Error (Event 106) on Exchange Servers

Tuesday, November 29, 2016
You may see multiple warnings or errors in the Application event log on Exchange servers for event 106, indicating that performance counters could not be updated.

Multiple Event ID 106 - Perf Counter Events
An example event 106 reads,
Log Name:      Application
Source:        MSExchange Common
Date:          11/29/2016 12:24:28 PM
Event ID:      106
Task Category: General
Level:         Warning
Keywords:      Classic
User:          N/A
Computer:      EX16B.contoso.com
Description:
Performance counter updating error. Counter name is Percentage of Failed Offline GLS Requests in Last Minute, category name is MSExchange Global Locator OfflineGLS Processes. Optional code: 3. Exception: System.InvalidOperationException: The requested Performance Counter is not a custom counter, it has to be initialized as ReadOnly.
   at System.Diagnostics.PerformanceCounter.InitializeImpl()
   at System.Diagnostics.PerformanceCounter.get_RawValue()
   at Microsoft.Exchange.Diagnostics.ExPerformanceCounter.set_RawValue(Int64 value)
The TechNet article, "'Performance counter updating error' after you install an Exchange Server 2013 cumulative update", indicates this is a problem on Exchange 2013 after applying a CU, but I've seen this happen after applying an update rollup, cumulative update, or .NET Framework update on Exchange 2010, Exchange 2013, or Exchange 2016 servers.

I wrote the following PowerShell script to reload the Exchange performance counters. You run it directly on the affected Exchange server from an elevated PowerShell or EMS prompt. The script will reload all the performance counters in the %ExchangeInstallPath%\setup\perf directory.
Add-PSSnapin Microsoft.Exchange.Management.PowerShell.Setup
$perfcounters = Get-ChildItem "$env:ExchangeInstallPath\Setup\Perf\" *.xml | Where-Object {!($_.psiscontainer)}
$perfcount = $perfcounters.Count

foreach ($perfcounter in $perfcounters) {
New-PerfCounters -DefinitionFileName $perfcounter.FullName -ErrorAction SilentlyContinue
Write-Progress -Activity "Reloading $perfcount Exchange Performance Counters" -PercentComplete (($i++ / $perfcount) * 100)}
The script may take a few minutes to run and will reload all the Exchange performance counters. Once complete, the event 106 warnings or errors should stop.


Read more ...

Azure AD Connect Adds Support for Windows Server 2016 and SQL 2016

Friday, November 18, 2016
If you're a customer who uses Azure Active Directory Connect, you'll want to know that Microsoft just released version 1.1.343.0, which adds support for Windows Server 2016 and SQL Server 2016 and fixes some bugs.

Improvements:
  • Added support for installing Azure AD Connect on Windows Server 2016 standard or better.
  • Added support for using SQL Server 2016 as the remote database for Azure AD Connect.
  • Added support for managing AD FS 2016 using Azure AD Connect.
Fixed issues:
  • Sometimes, installing Azure AD Connect fails because it is unable to create a local service account whose password meets the level of complexity specified by the organization's password policy.
  • Fixed an issue where join rules are not re-evaluated when an object in the connector space simultaneously becomes out-of-scope for one join rule and become in-scope for another. This can happen if you have two or more join rules whose join conditions are mutually exclusive.
  • Fixed an issue where inbound synchronization rules (from Azure AD) which do not contain join rules are not processed if they have lower precedence values than those containing join rules.

You can download the latest version HERE.

Read more ...

How to Perform HTTP -> HTTPS Redirection in a Single Exchange Server Environment

Tuesday, August 30, 2016
HTTP to HTTPS redirection in Outlook Web App is a user convenience that many admins consider a necessity. It automatically redirects the user's browser to https://mail.contoso.com/owa if they enter http://mail.contoso.com, or simply mail.contoso.com. Without redirection, the user will get an HTTP 403 Forbidden error page, like the one below.


This happens because the SSL settings on the Default Web Site and all subdirectories are configured to require SSL.

In multi-server environments where load balancers are used, HTTP -> HTTPS redirection is normally performed on the load balancer. Most load balancers, such as KEMP or F5, automatically configure it when you deploy one of their Exchange server templates.


In single Exchange environments without a load balancer, you must configure redirection directly on the server itself. The steps below explain how to do this. I've used this method since Exchange 2007 and it works perfectly 100% of the time. Other methods I've seen on the Internet sometimes cause routing errors.

  • Open Internet Information Services (IIS) Manager on the Exchange 2016 or Exchange client access server and navigate to Sites > Default Web Site.
  • Double-click Error Pages and add a new custom error page for status code 403.4 that responds with a 302 redirect to https://mail.contoso.com/owa.


  • Special note for Exchange 2016 - The Exchange team did a little number in the web.config file on Exchange servers to "improve performance", but it removes the custom error page behavior. So you'll need to do the following:
    • Open the C:\inetpub\wwwroot\web.config file in Notepad.
    • Remove the following line, and then save and close Notepad:
<remove name="CustomErrorModule" />


Note that this web.config edit will need to be made after every Exchange 2016 CU installation since setup overwrites this file.

That will handle the HTTP 403.4 - Forbidden: SSL is required error behavior in the browser. All that's left is to handle what happens when a user enters https://mail.contoso.com.

  • Using Notepad, create a web page called default.htm in the C:\inetpub\wwwroot folder of the Exchange 2016 or client access server. Add the following three lines:

<html>
<meta http-equiv="REFRESH" content="0;url=/owa">
</html>
  • Save and close Notepad, and then test redirection.

Read more ...

How to Change the From Address in OWA

Monday, August 22, 2016
If you have Send-As rights for another mailbox, you may want to send email as that other user from your own mailbox. You may also want to send as an Office 365 Group so that all replies to your message go back to that group.

This is easy enough to do in the Outlook client by clicking the From drop-down box and selecting the appropriate account or entering an email address. It's not quite that intuitive in Outlook Web App (OWA), but it can still be managed.

First, you need to display the From field for the message you are composing in OWA. Click the [...] ellipses button and select Show From:


Next, right-click From the email address and select Remove:


Now type in the email address of the user or Office 365 Group you want to send the email as:


Of course you need to have rights to send as the user for this to work properly, otherwise you will get an NDR saying, "You don't have rights to send as this user."

Note that the sent item will go into your Sent Items folder, not the user's who you are sending as.


Read more ...

Announcing the 9th Annual UC Roundtable at Microsoft Ignite, Atlanta!

Tuesday, August 16, 2016

I'm pleased to announce the 9th Annual UC Roundtable at Microsoft Ignite 2016 in Atlanta!


A one of a kind conference deserves a one of a kind opportunity to network with your peers.

The purpose of the UC Roundtable is to gather Exchange, Office 365, and Skype for Business admins, MCMs, MVPs, Exchange product group members, architects, and experts for a free-flowing discussion about issues, questions, and experiences related to Exchange, Office 365, and Skype for Business. If you work with Exchange, Office 365, or Skype for Business or Lync Server you need to be here!

Wednesday, September 28th from 7:30PM to 11:00PM EDT

A big special thank you to my friends at F5 who will be hosting the event for the fifth year in a row! Those of you who have attended previous UC Rountables know that they put on a great event.

Please RSVP to jeff@expta.com for event details and location. I will email you the details via EventBrite.

Help spread the word on Twitter and I hope you can join me!

-=-=-=-=-=-=-=-=-=-=-=-=-=-=-=-

Also, I'm pleased to say that I will be presenting two sessions at Microsoft Ignite this year:
We will take questions from the audience and give advice from the voice of independent experience. I hope you can join me for these sessions. Check out the MyIgnite tool and schedule builder at myignite.microsoft.com.


Read more ...

New Set-AutodiscoverSCP v2 script is on the TechNet Gallery

Friday, July 22, 2016
Set-AutodiscoverSCP.ps1
I just published version 2.0 of my Set-Autodiscover.ps1 script to the TechNet Gallery. This is a complete rewrite of the old script and includes the following new features:
  • Made setting the new values easier by cloning an existing server
  • Now also configures Outlook Anywhere and all Exchange virtual directory internal and external URLs
  • Revised verbiage and use *-ClientAccessService cmdlets for Exchange 2016
  • Added -Verbose output to display the values we're configuring
  • Improved overall display output
These changes are intended to make the script more powerful and easier to use.


How many times have you installed a new Exchange 2010-2016 server only to hear users complain about a security pop-up in Outlook referencing the new server?

This happens because Exchange setup uses the FQDN of the server as the service connection point (SCP) that Outlook clients use for autodiscover requests (for example, https://exch03.contoso.local/autodiscover/autodiscover.xml). This new SCP is configured in Active Directory when the Front-End Client Access role is installed during setup. In most load balanced environments the valid SCP should be something like https://autodiscover.contoso.com/autodiscover/autodiscover.xml. Outlook will prompt users with a security warning because the self-signed Exchange certificate installed by setup is not trusted. If the new server is Internet-facing, ActiveSync clients can also get security warnings on their mobile device.


Read Exchange Active Directory Deployment Site for more information about this behavior.

I wrote a script, Set-AutodiscoverSCP.ps1 (available on the TechNet Gallery), that automatically updates the SCP, Outlook Anywhere FQDNs, and all the virtual directory internal/external URLs for the server your specify to match the values currently configured on another server you specify as soon as the new server is detected in AD. It continually polls Active Directory until it finds the new SCP value and sets the new values. A progress bar indicates that the script is polling AD.

The script is intended to run on another Exchange server in the org running the same version of Exchange as the new server. This is because Exchange 2010 cannot update SCP values for Exchange 2013 or 2016, and vice versa. You can also have the script target a particular domain controller. This is useful when the new server you are installing is in a different AD site.

The syntax for Set-AutodiscoverSCP.ps1 is:
Set-AutodiscoverSCP.ps1 [-Server] <String> [-ServerToClone] <String> [[-DomainController] <String>] [<CommonParameters>]
Two examples of usage:
PS C:\>Set-AutodiscoverSCP.ps1 -Server exch02 -ServerToClone exch01
Example #1 continually queries the current configuration domain controller until it finds an SCP for server EXCH02 and then sets it to match the SCP of EXCH01. It also configures Outlook Anywhere and the internal/external virtual directory URLs to match those found on EXCH01.

PS C:\>Set-AutodiscoverSCP.ps1 -Server exch02 -ServerToClone exch01 -DomainController dc03
Example #2 is almost the same as the command in the previous example, except it continually queries DC03 for the SCP record and configures it on that domain controller. This is useful when configuring a new Exchange server in a different Active Directory site.

The script is designed to be run during installation. Normally, you would run this script from an existing Exchange server of the same version while the new server is being installed.

You can also run the script directly from the server that is being installed. This is useful when you're installing the first Exchange 2013/2016 server in a 2010 environment. You can start running the script on the new server when the Client Access Front End Service is being installed. The caveat is that setup restarts IIS and web services several times during setup, causing the script to possibly stall during configuration of the virtual directories. If that happens, simply CTRL-C to quit the script and run it again.

I've included error handling for the following conditions:

  1. The script notifies you what version of Exchange is running the script and warns you to make sure the new server is running the same version. Note that Exchange 2013/2016 servers can update each other. This warning really only applies to Exchange 2010 and Exchange 2013/2016 coexistence. 
  2. The script checks that the server, server to clone, and the domain controller (if specified) are pingable. If the servers cannot be pinged, the script will terminate.
  3. If a domain controller is specified, it validates that the DC specified is actually a domain controller

Set-AutodiscoverSCP.ps1 is a useful addition to your Exchange toolbox. Please let me know if you have any questions or feature requests. I'll update the script again on the TechNet Gallery as needed.

Read more ...

Cannot Create Frontend Receive Connector using Exchange 2016 CU2 Admin Center

Wednesday, July 13, 2016
I've heard a few people complaining about this on Twitter and social media, so I figured I document it here.

You may find when you create a new Receive Connector using the Exchange Admin Center from an Exchange 2016 CU2 server that you cannot create the new connector as a Frontend Hub Transport role. The option to select the Frontend Transport role is grayed out and defaults to the Hub Transport role.

New receive connector role is grayed out

I've been able to reproduce this bug when the admin account used to create the new receive connector has a mailbox hosted on an Exchange 2016 CU server. If the admin account's mailbox is hosted on Exchange 2013 you can select the Frontend Transport role as expected.

This smells very much like a mailbox anchoring issue, which was supposed to have been reversed in Exchange 2016 CU2.

There are three workaround for this:
  • Create the new receive connector using the Exchange Management Shell (EMS)
  • Create the new receive connector from the Exchange 2013 Admin Center. Note you will need to connect directly to the Exchange 2013 EAC using the Exchange 2013 server's FQDN. For example, https://EX2013.contoso.com/ecp/?exchclientver=15
  • Move the admin account's mailbox to an Exchange 2013 server. Note that this bug will still occur if the admin mailbox is hosted on an Exchange 2010 server.
You can create a new frontend transport receive connector via the Exchange Management Shell using a cmdlet similar to this example:
New-ReceiveConnector -Name 'New Receive Connector' -RemoteIPRanges @('10.0.1.0-10.0.1.255') -Bindings @('0.0.0.0:25') -Usage 'Custom' -Server 'EX16B.contoso.com' -TransportRole 'FrontendTransport' 
I've created a bug for this on Microsoft Connect. Hopefully it will be corrected in Exchange 2016 CU3.

Irritating Side Note:
Why, oh why, does the Exchange Admin Center default to creating a Hub Transport role receive connector in the first place?? 99.99% of all receive connectors created by admins should be Frontend Transport role connectors. This causes much wailing and gnashing of teeth because the new receive connector doesn't function as expected.

In order to change the role to Frontend Transport, run the following cmdlet:
Set-ReceiveConnector "Receive Connector" -TransportRole "FrontendTransport"
FYI - I have an Exchange design change request logged to make the default transport role Frontend Transport, too. <holding breath>

Read more ...

MAPI Virtual Directory Bug in Exchange 2016 CU2

Wednesday, June 29, 2016
I discovered a bug in Exchange 2016 CU2 where if you change the MAPI virtual directory URLs using the Exchange Admin Center (EAC), it clears all forms of authentication from the MAPI virtual directory. This will cause all Outlook clients to constantly prompt for credentials because there are no ways for Outlook to authenticate.

All authentication methods are disabled

The default IISAuthenticationMethods for the MAPI virtual directory are NTLM, Negotiate, and OAUTH.

Steps to reproduce the issue:
  • Double-click the MAPI virtual directory from the Exchange Admin Center to confirm that authentication is set to NTLM and Negotiate. Note that OAUTH is not shown as an authentication method in EAC. Click Cancel to close the dialog box.
  • Double-click the MAPI virtual directory and change the internal and/or external URL and click Save.
    • Observing the command console, the cmdlet executed is: Set-MapiVirtualDirectory -ExternalUrl 'https://mail.contoso.com/mapi' -IISAuthenticationMethods @() -Identity 'fe29d135-6f9c-4191-a68e-b028d94bd7ff'
  • If you examine the authentication settings before you click Save, the authentication settings will be written as NTLM and Negotiate (missing OAUTH).
    • Observing the command console, the cmdlet executed is: Set-MapiVirtualDirectory -ExternalUrl 'https://mail.contoso.com/mapi' -IISAuthenticationMethods @(Ntlm,Negotiate) -Identity 'fe29d135-6f9c-4191-a68e-b028d94bd7ff'

This bug affects both Exchange 2013 and Exchange 2016 MAPI virtual directories configured using the Exchange 2016 CU2 EAC. Note that the MAPI virtual directory was not exposed in the EAC until Exchange 2016 RTM, so you won't see it in the Exchange 2013 EAC.

If you change the URLs via the Exchange Management Shell (without using the -IISAuthenticationMethods parameter) the URLs are updated without affecting the authentication methods.

To set the authentication methods for all MAPI virtual directories back to their defaults, run the following cmdlet from EMS:
Get-MapiVirtualDirectory | Set-MapiVirtualDirectory -IISAuthenticationMethods @(Ntlm,Negotiate,OAuth)
All MAPI virtual directories set back to default authentication methods

I reported this bug on Connect and Microsoft confirmed this is an issue with Exchange Server 2016 CU2.

Read more ...

How to Quickly Determine Exchange Server Versions

Tuesday, June 28, 2016
It's fairly easy to determine the version of Exchange Server running on a server using the Exchange Management Shell. The following cmdlet will display the Exchange version for each server in the organization, according to Active Directory:
Get-ExchangeServer | fl name,AdminDisplayVersion
The output will look something like this:


The AdminDisplayVersion value tells you the Exchange version using the following ww.xx.yyyy.zzz format:

MajorVersion | ServicePack | CumulativeUpdate/UpdateRollup | MinorVersion

For example, 14.3.0123.004 is Exchange 2010 Service Pack 3, 15.0.1178.004 is Exchange Server 2013 CU13, and 15.1.0466.034 is Exchange Server 2016 CU2. You can refer to Exchange Server Updates: build numbers and release dates to determine the exact version of Exchange is running. You can also run the Get-ExchangeServerBuildNumbers cmdlet in Exchange 2013 or Exchange 2016. This cmdlet scrapes the same webpage and displays the Product Names, Release Dates, and Build Numbers for every version of Exchange Server going as far back as Exchange Server 4.0 Standard Edition, released on June 11, 1996. Worth memorizing if you want to win one of Tony Redmond's famous Exchange trivia contests. :)

Note that Exchange 2013 CU4 was released as "Exchange 2013 Service Pack 1", but the ServicePack build number did not really increment until Exchange 2016 to 15.1, further demonstrating that Exchange 2016 is really just an incremental upgrade to Exchange 2013.

But what if you don't have easy access to EMS, or you want to check the version of the Exchange Server your mailbox is hosted on in Exchange Online for some reason?

If your on-prem Exchange 2013/2016 organization is using MAPI over HTTP (and you really should be) you can use the following URL to check which version of Exchange is running on the server hosting your mailbox:
https://<serverFQDN>/mapi/emsmdb/
For Office 365 use https://outlook.office.com/mapi/emsmdb/

The output will show the server version number, as shown below.


The cool thing about this method is that even works externally as long as Outlook Anywhere is published to the Internet. Keep in mind that the version returned is for the server hosting the mailbox being accessed, not the front-end client access proxy server. You can tell which front-end CAS your hitting by observing the Cafe server value.

Note that this method won't work if you haven't configured MAPI/HTTP or for mailboxes hosted on Exchange 2010 or earlier because they don't support MAPI over HTTP.

Read more ...

Exchange 2016 CU2 and Exchange 2013 CU13 now supports .NET Framework 4.6.1

Tuesday, June 21, 2016
Prior to Exchange 2016 CU2 and Exchange 2013 CU13, .NET Framework 4.6.1 was not supported with Exchange server. It still isn't supported for Exchange 2010 and most likely will never be, so you'll still need to block it as per the steps in my previous article.

The EHLO Blog post explaining support for .NET Framework 4.6.1 and all the other new Cumulative Update goodness can be read in the article, Released: June 2016 Quarterly Exchange Updates.

If you previously blocked .NET Framework 4.6.1 installation via the registry you'll need to remove that block by removing the "BlockNetFramework461" DWORD value from the registry in HKEY_LOCAL_MACHINE\SOFTWARE\Microsoft\NET Framework Setup\NDP\WU.

The recommended order of operations for installation is:

  • Install Exchange Server 2016 CU2 or Exchange Server 2013 CU13 on your Exchange server. Restart.
  • Remove the block for .NET Framework 4.6.1 from Windows Update (see key above).
  • Download and install .NET Framework 4.6.1 from Windows Update. Restart.
    • Note: The Exchange assemblies will recompile when the server starts back up. This will take several minutes and Exchange performance will suck during this time. I recommend downloading and running the NET Framework optimization speed up script from the .NET Blog. to make this process run faster.
  • Download and install the appropriate post-release fixes for the .NET Framework:
  • Restart and run the NET Framework optimization speed up script again. 
  • Personally, I would restart again just to make sure everything starts up correctly.
Read more ...

Intel NUCs - Another Take on EXPTA Home Lab Servers. Builds and Parts Lists.

Friday, June 3, 2016

Own a blistering fast two-node Hyper-V lab cluster for under $1,680!

Today, I'm doing another take on my well-know home Hyper-V lab server series. My latest Gen7 builds are single-server builds with 64GB-128GB ranging from $920-$1,915 per server. That gives you super-high density in a single small, but powerful, server. In this article I'll show you how to create a two-node Hyper-V cluster using Intel NUC servers so you can learn how to use Hyper-V replication and provide true high availability and fail-over.

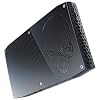
The Intel NUC (Next Unit of Computing) is a Mini PC with the power of a desktop, packing powerful productivity in a tiny 4x4 form factor. Small enough to fit in your hand, each NUC is silent and stackable. They can sit on a bookshelf, or be mounted to a wall with the VESA bracket or directly on the back of a monitor.

I've always thought these NUCs would make great Hyper-V clusters, but until just recently they were under powered and could only hold a maximum of 16GB RAM. Now there are two brand new Intel 32GB models that make this a really exciting Hyper-V lab possibility:
  • Intel NUC Kit NUC6i5SYH - Features a 6th generation dual core Intel Core i5-6260U with Intel Iris 540 graphics; Up to 32GB DDR4 RAM; Up to one M.2 and one 2.5" internal drives
  • Intel NUC Kit NUC6i7KYK - Features a 6th Generation quad core Intel Core i7-6770HQ with Intel Iris Pro 580 graphics; Up to 32GB DDR4 RAM; Up to two M.2 internal SSD drives
Both NUCs use the same storage format -- a 256GB M.2 SSD for the OS, and a 512GB SSD to run high performance VMs. With disk deduplication enabled, you can host many VMs on each node. When configured as a Hyper-V cluster, you can enable true high availability and enable new scenarios, like Hyper-V Live Migrations and Hyper-V Replication.

I also recommend using a portable 1TB USB3 external hard drive that you can share out for storing ISOs, software applications, and base images (see below). Each NUC has 2x USB 3.0 and 2x USB 2.0 ports for fast I/O performance, dual-band wireless-AC networking, 1GB NIC, Bluetooth, and built-in audio.

All you need to get started is buy the parts listed below and plug them in. They work pretty much straight of the box - no real assembly required. You'll only need to plug in the RAM and drives.

As usual, I link to Amazon for components and prices. Amazon does a very good job of maintaining stock, has an excellent return policy, and most of these items are eligible for free two-day shipping via Amazon Prime. If you don't have Prime, you can sign up for a free Amazon Prime trial here and cancel after you order the equipment if you want. Please note that it's normal for Amazon prices to fluctuate (usually down) over time.


NUC i5 Build #1 -- Intel Core i5 Dual-Core, 32GB RAM, SSD for $837 each
Component Description
 
Intel NUC Kit NUC6i5SYH (BOXNUC6I5SYH) Silver/Black
This is a 6th generation Intel Core i5-6260U dual core processor with Intel Iris graphics 540 (1.9GHz up to 2.8 GHz Turbo, 4MB Cache, 15W TDP). Supports 1x M.2 Type M SSD and 1x 2.5" SSD. 1x full-size HDMI 1.4b and 1x Mini DisplayPort 1.2 ports. 7.1 surround audio via HDMI and Mini DisplayPort. Headphone and mic jacks. 2x USB 3.0, 2x USB 2.0, and SDXC slot with UHS-I support. Dimensions: 115mm x 111mm x 48mm (roughly 4.5" by 4.5" x 1.8" - super tiny!). 19V, 65W wall-mount multi-country AC-DC power adapter (IEC types A/C/G/I). 3 year limited warranty.
 
CRUCIAL TECHNOLOGY 32GB Kit (16GBx2) DDR4 2133 MT/s (CT2K16G4SFD8213)
1.2V quad channel 2133MHz DDR 400 SODIMM memory with low CL15 latency. Great RAM at a great price. Each package contains 2x 16GB SODIMMs (32GB total). Lifetime warranty.
 
Samsung 950 PRO Series - 256GB PCIe NVMe - M.2 Internal SSD (MZ-V5P256BW)
The next-generation Samsung 950 PRO delivers uncompromising power and performance. Next Generation M.2 SSD Based on NVMe Protocol (PCIe, Gen. 3, x4). Ultra-fast Sequential Read/Write Performance: Up to 2,200MB/s and 900MB/s Respectively. Random Read/Write IOPS Performance : Up to 270K and 85K Respectively. Ultimate Performance, Reliability, & Efficient Power Management Powered by Samsung V-NAND Technology. 5 year limited warranty.
 
Samsung 850 EVO 500GB 2.5-Inch SATA III Internal SSD (MZ-75E500B/AM)
500GB SATA III 6Gb/s SSD used for active VMs (the VMs I normally have running, like a Domain Controller, Exchange servers, Skype/Lync servers, etc.). Enabling Windows Server 2012R2 disk deduplication provides even more storage capacity! Delivers up to 98K IOPS 4KB random read / 90K IOPS 4KB random write speed. Mwahaha!! 3 year limited warranty.

Obviously, you'll need two of these NUCs if you want to cluster them and you can always choose to buy one now and cluster them later.
I always update the BIOS from the Internet before installing the OS. Once you install the OS, install and/or upgrade the drivers (especially the NIC) from the manufacturers' websites. Then install the Hyper-V role and you're off to the races!
You can host quite a few VMs on this system. As an example, my Gen6 32GB server runs Windows Server 2012 R2 with the Exchange 2013 Edge Transport role and the Hyper-V host server role. This server has been running 24x7 for over a year with the following virtual machines:
  • 1x Domain Controller (2GB dynamic RAM)
  • 2x Exchange 2016 servers in a DAG (4-6GB each)
  • 1x Exchange 2013 server (4GB)
  • 1x Exchange 2010 server (4GB)
  • 1x Lync 2013 server (4GB)
  • 1x Application server (2GB)
I run these VMs off the 500GB SSD with Windows Server 2012 R2 disk deduplication enabled for Virtual Desktop Infrastructure (VDI). This allows me to put 669GB of data on this 500GB drive and I still have 145GB free space left! See Windows Server 2012 Deduplication is Amazing! for information about configuring this.


Now if you're looking for the ultimate in NUC performance check out this Intel i7 quad-core NUC:

NUC i7 Build #2 -- Intel i7 Quad-Core, 32GB RAM, 2x M.2 SSD for $1,316 each
Component Description
 
Intel NUC Kit NUC6i7KYK Mini PC (BOXNUC6I7KYK1)
This is a 6th generation Intel Core i7-6770HQ quad core processor with Intel Iris graphics 580 (2.6GHz up to 3.5 GHz Turbo, 6MB Cache, 45W TDP). Supports 2x M.2 Type M SSDs. 1x full-size HDMI 2.0 and 1x Mini DisplayPort 1.2, Thunderbolt 3 ports. 7.1 surround audio via HDMI and Mini DisplayPort. Headphone and mic jacks. 2x USB 3.0, 2x USB 2.0, and SDXC slot with UHS-I support. Dimensions: 211mm x 116mm x 28mm (roughly 8.3" by 4.5" x 1" - the size of a small paperback book!). 19V, 120W wall-mount AC-DC power adapter. 3 year limited warranty.
 
CRUCIAL TECHNOLOGY 32GB Kit (16GBx2) DDR4 2133 MT/s (CT2K16G4SFD8213)
1.2V quad channel 2133MHz DDR 400 SODIMM memory with low CL15 latency. Great RAM at a great price. Each package contains 2x 16GB SODIMMs (32GB total). Lifetime warranty.
 
Samsung 950 PRO Series - 256GB PCIe NVMe - M.2 Internal SSD (MZ-V5P256BW)
256GB for OS. The next-generation Samsung 950 PRO delivers uncompromising power and performance. Next Generation M.2 SSD Based on NVMe Protocol (PCIe, Gen. 3, x4). Ultra-fast Sequential Read/Write Performance: Up to 2,200MB/s and 900MB/s Respectively. Random Read/Write IOPS Performance : Up to 270K and 85K Respectively. Ultimate Performance, Reliability, & Efficient Power Management Powered by Samsung V-NAND Technology. 5 year limited warranty.
 
Samsung 950 PRO Series - 512GB PCIe NVMe - M.2 Internal SSD (MZ-V5P512BW)
512GB for VMs. The next-generation Samsung 950 PRO delivers uncompromising power and performance. Next Generation M.2 SSD Based on NVMe Protocol (PCIe, Gen. 3, x4). Ultra-fast Sequential Read/Write Performance: Up to 2,500MB/s and 1,500MB/s Respectively. Random Read/Write IOPS Performance : Up to 300K and 110K Respectively. Ultimate Performance, Reliability, & Efficient Power Management Powered by Samsung V-NAND Technology. 5 year limited warranty.

This NUC just SCREAMS performance! If it was available with 64GB of RAM this would be my go-to build, hands down. Maybe next year. :)

I also recommend the following to complete your NUC Hyper-V lab builds:

NUC Server Build Recommended and Optional Components
Component Description
 
*Highly Recommended*
Western Digital 1TB Black My Passport Ultra Portable External Hard Drive - USB 3.0 - (WDBGPU0010BBK-NESN)
Secure portable USB 3.0 storage with optional 256-bit AES hardware encryption. Available up to 3TB. Pre-formatted with NTFS. No power supply required. Use this to store software installs, ISOs, golden masters of your VM images, etc. 3-year limited warranty.
 
Samsung 850 Pro 1 TB 2.5-Inch SATA III Internal SSD (MZ-7KE1T0BW)
Upgrade your 500GB SATA III 6Gb/s SSD used for active VMs to the 850 Pro 1TB SSD. Delivers up to 90K IOPS 4KB random read / 100K IOPS 4KB random write speed. 10 year limited warranty.
VicTsing Gold-Plated HDMI to VGA Converter Adapter for PC, Laptop, DVD, Desktop (VS1-VC38BVT-VD)
Ultra-mini HDMI to VGA converter converts video from HDMI to any monitor or projector with a VGA port. Useful if you have an old-school KVM that doesn't support HDMI or DisplayPort.
 
Cable Matters Mini DisplayPort (Thunderbolt™ 2 Port Compatible) to HDMI/DVI/VGA Male to Female 3-in-1 Adapter in Black - Supporting 4K Resolution via HDMI
Lightweight and portable adapter for connecting a Mini DisplayPort (Mini DP or mDP)/Thunderbolt 2 port compatible computer to an HDTV, monitor, or projector with HDMI/DVI/VGA; A separate HDMI/DVI/VGA cable is required. Transmits both audio and video from computer or tablet to HD display via HDMI; Supports video resolutions up to 4K via HDMI or 1920x1200 and 1080p (Full HD) via VGA/DVI and flawless audio pass-thru for uncompressed digital 7.1, 5.1 or 2 channels.

I hope these NUC builds give you the confidence to build your own Hyper-V home cluster. I'm interested to hear your experiences in the comments section below. Happy building!
Read more ...

EXPTA Gen7 Home Lab Server Builds and Parts Lists

Monday, May 16, 2016
Build your own blistering fast 64GB Windows Hyper-V lab server starting for under $1000!

Take a look at my companion article, "Intel NUCs - Another Take on EXPTA Home Lab Servers" to build a two-node Hyper-V cluster for $1,680!

I'm very pleased to provide you my latest EXPTA Gen7 home lab server builds. Advances in hardware and virtualization technology have made it possible for IT Pros to build sophisticated systems that host more VMs than ever before. Now you can build a 64GB quad-core i5 server with lightening fast SSDs for under $1,000!! That's twice the RAM and a newer Skylake processor for the same price as my 32GB Gen6 server!

I'm providing three different server builds:
  •  Intel Core i5 quad-core, 64GB RAM, SSD, small form-factor for $920.  Super-fast lab server with name-brand quality! This makes it super-easy for IT Pros to build a blistering fast Windows Hyper-V server that can run lots of VMs.
  •  Intel Xeon-D quad-core, 128GB RAM, SSD, small form-factor for $1,750.  This new Gen7 build is geared toward those who need more VM density with outstanding performance. Super reliable server-class hardware with ECC RAM. You can chose to go with 64GB for now and upgrade to 128GB later for only $1375!!!
  •  Intel Xeon E5 eight-core, 128GB RAM, SSD, ATX form-factor for $1,915.  Double the cores and double the RAM for outstanding performance. Build your own private cloud in a box! This new build also uses true server hardware and ECC RAM for the ultimate in reliability and scalability.
Each of my three Gen7 server builds use components from the vendors' hardware compatibility lists to ensure the utmost in reliability and performance. They will all run Windows Server 2012 R2 and should be "future-proof" to run the upcoming release of Windows Server 2016.

All three Gen7 builds uses the same storage format -- a 250GB SSD for the OS, a 500GB or 1TB SSD for regularly running high performance VMs, and a 2TB high performance spinning hard drive for storing ISOs, software applications, and base images. Each server utilizes SATA III 6Gb/s drives and USB 3.0 ports for fast I/O performance.

If you need help setting this gear up, take a look at my previous Gen4 and Gen5 server build articles for assistance. Building these servers takes about an hour and it's fun!

As usual, I link to Amazon for components and prices. Amazon does a very good job of maintaining stock, has an excellent return policy, and most of these items are eligible for free two-day shipping via Amazon Prime. If you don't have Prime, you can sign up for a free Amazon Prime trial here and cancel after you order the equipment if you want. Please note that it's normal for Amazon prices to fluctuate (usually down) over time.

Gen7 Build #1 -- Intel Core i5 Quad-Core, 64GB RAM, SSD, Small Form-Factor Micro-ATX, 211W for $920
Component Description
 
Intel Boxed Core I5-6600 FC-LGA14C 3.30 Ghz 6 M Processor Cache 4 LGA 1151 BX80662I56600
This is a 6th generation Intel LGA1151 Skylake processor and includes Intel HD Graphics 530, so no discrete video card is required. Intel Turbo Boost up to 3.9 GHz and runs at only 65W! Includes Intel aluminum heatsink with thermal compound and a large silent CPU fan. 3 year limited warranty.
 
CRUCIAL TECHNOLOGY 64GB Kit (16GBx4) DDR4 2133 MT/s (CT4K16G4DFD8213)
1.2V 288-pin quad channel 2133MHz DDR4 SDRAM. Low CL15 latency. Great RAM at a great price. Each package contains 4x 16GB DIMMs (64GB). Lifetime warranty.
 
Gigabyte GA-B150M-D3H Micro ATX LGA1151 Motherboard
I chose this socket 1151 Micro ATX motherboard because it supports up to 64GB quad-channel DDR4 RAM and has 6x SATA III 6Gb/s connectors. It uses the Intel B150 Express chipset, has 1 x PCI Express x16 slot running at x16, 1 x PCI Express x16 running at 4x, HDMI/DVI/VGA outputs, 6 USB 3.0 and 6 USB 2.0 ports, and an Intel GbE LAN chip (see important note below). It also has a great UEFI BIOS. 3 year limited warranty.
 
Samsung 850 EVO 250GB 2.5-Inch SATA III Internal SSD (MZ-75E250B/AM)
256GB SATA III 6Gb/s SSD used for the Windows Server operating system. Legendary Samsung quality. Delivers up to 100,000 IOPS 4KB random read / 90,000 IOPS 4KB random write speed. 3 year warranty.
 
Samsung 850 EVO 500GB 2.5-Inch SATA III Internal SSD (MZ-75E500B/AM)
500GB SATA III 6Gb/s SSD used for active VMs (the VMs I normally have running, like a Domain Controller, Exchange servers, Skype/Lync servers, etc.). Enabling Windows Server disk deduplication provides even more storage capacity! Delivers up to 98K IOPS 4KB random read / 90K IOPS 4KB random write speed. Mwahaha!! 3 year limited warranty.
 
Western Digital Black 2TB Performance Desktop Hard Disk Drive - 7200 RPM SATA 6 Gb/s 64MB Cache 3.5 Inch - WD2003FZEX
Best selling high performance 2TB WD Caviar Black SATA III 6Gb/s drive. Used for storing ISOs, software packages, seldom used VMs, base images, etc. I usually configure this drive to sleep after 10 minutes to save even more power. 5 year warranty.
 
Lite-On 24X SATA Internal DVD+/-RW Drive Optical Drive IHAS124-14
Great quality SATA III 24x ±RW DVD burner. It's cheap, too. As much as I think I can get away from having a DVD drive, I still find I need one once in a while.1 year limited warranty.
  Xion Performance Meshed mATX USB 3.0 Tower Case XON-560_WT White
Unique hybrid mesh high performance mid-tower micro-ATX case with removable drive bay cages for easy access. Pimped out with blue LEDs, which you can choose not to use. 1x external 5.25" drive bay and 2x internal 3.5" drive bays. Includes front USB 3.0 and 2.0 and audio ports. Great build quality and cable management.
  Corsair CX Series, CX430M, 430 Watt (430W), Semi Modular Power Supply, 80+ Bronze Certified
430 watt modular PSU with super quiet 80mm cooling fan system. Up to 85% energy efficiency means less heat generation and lower energy bills. Modular, so you only use the cables you need and keep it neat.
 
We need 4x SATA cables for this build. The Gigabyte motherboard comes with two SATA cables, so we need two more. Flat (not L shaped) connectors work best for this build. FYI there's no technical difference between SATA2 and SATA3 cables.

Build #1 is pretty straight forward. Make sure you have everything you need and enough space to work. Most builds take about an hour and always seem to go smoother with a cold refreshing adult beverage nearby. Assemble the drives first, then install the PSU, motherboard, CPU and RAM to button it up. Fellow MVP Andrew Higginbotham built this rig and shared some photos of how he racked the drives. I always update the BIOS from the Internet before installing the OS. The Gigabyte BIOS allows you to do this directly from the BIOS. Nice! Once you install the OS, install and/or upgrade the drivers (especially the NIC) from the manufacturers' websites. Then install the Hyper-V role and you're off to the races!
Important Note: The Gigabyte GA-B150M-D3H motherboard uses an integrated Intel gigabit NIC. I love this motherboard, but unfortunately Intel cripples their NIC drivers so they cannot be used with Windows Server operating systems. I detailed how to overcome this in my Gen5 server build (look toward the end of the article), There's another very good article here that also covers it. You'll need to go through these steps to install and/or upgrade the Intel NIC drivers for Builds #1 or #3.
You can host quite a few VMs on this system. As an example, my Gen6 32GB version of this server runs Windows Server 2012 R2 with the Exchange 2013 Edge Transport role and the Hyper-V host server role. This server has been running 24x7 for over a year with the following virtual machines:
  • 1x Domain Controller (2GB dynamic RAM)
  • 2x Exchange 2016 servers in a DAG (4-6GB each)
  • 1x Exchange 2013 server (4GB)
  • 1x Exchange 2010 server (4GB)
  • 1x Lync 2013 server (4GB)
  • 1x Application server (2GB)
I run these VMs off the 500GB SSD with Windows Server 2012 R2 disk deduplication enabled for Virtual Desktop Infrastructure (VDI). This allows me to put 669GB of data on this 500GB drive and I still have 145GB free space left! See Windows Server 2012 Deduplication is Amazing! for information about configuring this.


Gen7 Build #2 -- Intel Xeon-D Quad-Core, 128GB RAM, SSD, Small Form-Factor Mini-ITX for $1,375
Component Description
 
SuperMicro X10SDV-4C-TLN2F-O Intel Xeon D-1520 DDR4 SATA3&USB3.0 V&2GbE Mini-ITX Motherboard & CPU Cooler
Intel Xeon D-1520 processor with System on a Chip design; Supports up to 45W TDP (quad-core). Supports up to 128GB ECC/REG Memory. 1x PCI-Express 3.0 x16 Slot; 1x M.2 Slot (M key for SSD, 2242/2280, PCI-Express 3.0 x4). 6x SATA3 Ports. Aspeed AST2400 integrated graphics. Dual-Port 10-Gigabit Ethernet Controller, 1x Realtek RTL8201N PHY (dedicated IPMI). 2x USB 3.0 Ports, 4x USB 2.0 Ports (via headers), 2x RJ45 10GBase-T Ports, 1x RJ45 Dedicated IPMI LAN Port, 1x VGA Port.
 
Crucial 64GB Kit (32GBx2) DDR4 2133 MT/s (PC4-2133) CL15 DR x4 ECC Registered DIMM 288pin Server Memory
You will need two of these kits for 128GB. Each kit contains two sticks of 32GB ECC RDIMMs (64GB total). The SuperMicro Xeon-D motherboard supports up to four DIMMs, so order one kit for 64GB or two kits for 128GB. 100% tested and comes with a lifetime warranty.
 
Samsung 850 EVO 250GB 2.5-Inch SATA III Internal SSD (MZ-75E250B/AM)
256GB SATA III 6Gb/s SSD used for the Windows Server operating system. Legendary Samsung quality. Delivers up to 100,000 IOPS 4KB random read / 90,000 IOPS 4KB random write speed. 3 year warranty.
 
Samsung 850 EVO 500GB 2.5-Inch SATA III Internal SSD (MZ-75E500B/AM)
500GB SATA III 6Gb/s SSD used for active VMs (the VMs I normally have running, like a Domain Controller, Exchange servers, Skype/Lync servers, etc.). Enabling Windows Server 2012 R2 disk deduplication provides even more storage capacity! Delivers up to 98K IOPS 4KB random read / 90K IOPS 4KB random write speed. Mwahaha!! If you're building with 128GB RAM you might consider upgrading to the 1TB Samsung drive. 3 year limited warranty.
 
Western Digital Black 2TB Performance Desktop Hard Disk Drive - 7200 RPM SATA 6 Gb/s 64MB Cache 3.5 Inch - WD2003FZEX
Best selling high performance 2TB WD Caviar Black SATA III 6Gb/s drive. Used for storing ISOs, software packages, seldom used VMs, base images, etc. I usually configure this drive to sleep after 10 minutes to save even more power. 5 year warranty.
 
Lite-On 24X SATA Internal DVD+/-RW Drive Optical Drive IHAS124-14
Great quality SATA III 24x ±RW DVD burner. It's cheap, too. As much as I think I can get away from having a DVD drive, I still find I need one once in a while.1 year limited warranty.
  Thermaltake Core V1 Mini ITX Cube Gaming Computer Case CA-1B8-00S1WN-00
Beautiful Mini-ITX cube with 2x USB 3.0, 1x Headphone, 1x Mic front ports. Internal bay holds 2x 3.5", 2x 2.5" drives. 1x 200mm fan to keep everything nice and cool. Interchangeable side panels. Extreme air/liquid cooling configuration options and dual modular drive rack design with advance ventilation. Great Thermaltake quality.
  EVGA 430 W1 80+, 430W Continuous Power, 3 Year Warranty Power Supply 100-W1-0430-KR
430 watt PSU with super quiet 120mm cooling fan system. Up to 85% energy efficiency means less heat generation and lower energy bills. If you'd rather go with a modular PSU, use the Corsair CX430M PSU used in Gen7 Build #1.

This versatile Xeon-D 1520 build is a fantastic value! It offers screaming performance and true server reliability with ECC registered RAM in a tiny 10.9" x 12.4" x 10.2" package. This build was cost prohibitive just 6 months ago. You can start with 64GB RAM now and upgrade later to 128GB if you want. FTW!

Since this motherboard doesn't use Intel NICs, you won't need to do the Intel driver workaround required on the other builds.


Gen7 Build #3 -- Intel Xeon E5 Eight-Core, 128GB RAM, SSD, ATX Form-Factor for $1,915
Component Description
 
Intel Xeon E5-2609 Octa-Core V4 1.7 GHz 20MB L3 Cache LGA 2011 85W BX80660E52609V4 Server Processor
Intel Xeon 8-core 14 nm CPU architecture; 20MB L3 Cache; Only 85W. Terrific performance and reliability. 3 year limited warranty.
Cooler Master Hyper 212 EVO - CPU Cooler with 120mm PWM Fan (RR-212E-20PK-R2)
4 Direct Contact heat pipes with the patented CDC (Continuous Direct Contact) technology - creating a perfect, sleek surface for heat conduction. Silent 120mm cooling fan.
 
Kingston Savage 128GB (8 x 16GB) DDR4-2666 ECC Registered Server Memory
8x16GB = 128GB; 2666MHz DDR4; CL15 latency; ECC registered DIMMs. Built-in heat spreaders. 100% tested and comes with a lifetime warranty.
 
ASRock X99X KILLER LGA2011-v3/ Intel X99/ DDR4/ Quad CrossFireX & Quad SLI/ SATA3&USB3.0/ M.2/ A&2GbE/ ATX Motherboard
I chose this LGA 2011-v3 ATX motherboard because it has the Intel X99 chipset and supports up to 128GB RAM. It has 10x SATA III 6Gb/s connectors and 6x USB 3.0 Ports (4 rear, 2 via header); 8x USB 2.0 Ports (4 rear, 4 via headers). It has 3x PCI-Express 3.0 x16 Slots (one runs at x8), 1x PCI-Express 2.0 x16 Slot (runs at x4), and 1x PCI-Express 2.0 x1 Slot. Dual Intel I218V Gigabit Ethernet Controllers (see important note below). It also has a great UEFI BIOS. Includes 4x SATA cables. 3 year limited warranty..
EVGA GeForce 8400 GS Passive 1024 MB DDR3 PCI Express 2.0 Graphics Card DVI/HDMI/VGA, 01G-P3-1303-KR
Unlike Core i5 CPUs, Intel Core i7 and Xeon CPUs do not feature integrated graphics. This fan-less 1GB GeForce 210 video card features DVI-I, D-Sub, and HDMI outputs. Perfect for servers.
 
Samsung 850 EVO 250GB 2.5-Inch SATA III Internal SSD (MZ-75E250B/AM)
256GB SATA III 6Gb/s SSD used for the Windows Server operating system. Legendary Samsung quality. Delivers up to 100,000 IOPS 4KB random read / 90,000 IOPS 4KB random write speed. 3 year warranty./td>
 
Samsung 850 EVO 1 TB 2.5-Inch SATA III Internal SSD (MZ-75E1T0B/AM)
1TB SATA III 6Gb/s SSD used for active VMs (the VMs I normally have running, like a Domain Controller, Exchange servers, Skype/Lync servers, etc.). Enabling Windows Server 2012 R2 disk deduplication provides even more storage capacity! Delivers up to 98K IOPS 4KB random read / 90K IOPS 4KB random write speed. Mwahaha!! 3 year limited warranty.
 
Western Digital Black 2TB Performance Desktop Hard Disk Drive - 7200 RPM SATA 6 Gb/s 64MB Cache 3.5 Inch - WD2003FZEX
Best selling high performance 2TB WD Caviar Black SATA III 6Gb/s drive. Used for storing ISOs, software packages, seldom used VMs, base images, etc. I usually configure this drive to sleep after 10 minutes to save even more power. 5 year warranty.
 
Lite-On 24X SATA Internal DVD+/-RW Drive Optical Drive IHAS124-14
Great quality SATA III 24x ±RW DVD burner. It's cheap, too. As much as I think I can get away from having a DVD drive, I still find I need one once in a while.1 year limited warranty..
  Cooler Master HAF XB II EVO ATX HTPC Case RC-902XB-KKN2
ATX mid tower case; Removable drive cages; 2x Front 120mm fans to keep everything nice and cool. 2 x USB 3.0 Ports, 1 x e-SATA, audio in/out (HD) ports, and power/reset buttons in front. Great Cooler Master quality and roomy enough to take that big Cooler Master CPU cooler.
  EVGA 430 W1 80+, 430W Continuous Power, 3 Year Warranty Power Supply 100-W1-0430-KR
430 watt PSU with super quiet 120mm cooling fan system. Up to 85% energy efficiency means less heat generation and lower energy bills. If you'd rather go with a modular PSU, use the Corsair CX430M PSU used in Gen7 Build #1.

Gen7 Build #3 delivers the ultimate in scalability and reliability. With a Xeon E5 eight-core processor and 128GB this server is a beast. It utilizes a 1TB SSD drive for active VMs. With disk deduplication enabled I sincerely believe you can place all your active VMs there with no problem. This is truly a private cloud in a box.
Important Note: The ASROCK X99X KILLER motherboard uses an integrated Intel I218V gigabit NIC. I love this motherboard, but unfortunately Intel cripples their NIC drivers so they cannot be used with Windows Server operating systems. I detailed how to overcome this in my Gen5 server build (look toward the end of the article), There's another very good article here that also covers it. You'll need to go through these steps to install and/or upgrade the Intel NIC drivers for Gen7 builds #1 or #3.


There are a number of options you can add to each of these Gen7 builds. Here are some recommendations:

Server Build Optional Components
Component Description
 
TP-LINK TG-3468 10/100/1000Mbps Gigabit PCI Express Network Adapter
This PCI-e NIC will work in any of the three builds. The best practice for Hyper-V servers is to use a dedicated NIC for server management. This inexpensive option lets you do just that. You may also decide to use this NIC instead of monkeying around with the Intel NIC drivers on builds #1 and #3.
 
Samsung 850 Pro 256GB 2.5-Inch SATA III Internal SSD (MZ-7KE256BW)
Upgrade your 256GB SATA III 6Gb/s SSD to the 850 Pro version with 3D VNAND technology. Delivers up to 100,000 IOPS 4KB random read / 90,000 IOPS 4KB random write speed. 10 year warranty.
 
Samsung 850 Pro 1 TB 2.5-Inch SATA III Internal SSD (MZ-7KE1T0BW)
Upgrade your 1TB SATA III 6Gb/s SSD used for active VMs to the 850 Pro. Delivers up to 90K IOPS 4KB random read / 100K IOPS 4KB random write speed. 10 year limited warranty.
Sabrent 74-In-1 3.5-Inch Internal Flash Media Card Reader/Writer with USB Port (CR-USNT)
Adds another USB 2.0 port to the front of the server. Supports 74 different types of memory cards. The 6 card reader slots include all formats of the following flash media types: M2, XD, SD/SDHC/SDXC/MMC, Micro SD/SDHC/SDXC (T-flash) CF/MD, MS
 
Rosewill RDCR-11003 74-In-1 USB 3.0 3.5-Inch Internal Card Reader with USB Port (RDCR-11003)
This is the same type of card reader, but includes a USB 3.0 port instead of USB 2.0 and is better quality than the Sabrent reader.
 
Cable Matters SuperSpeed USB 3.0 Type A Male to Female Extension Cable in Black - 10 Feet
I strongly recommend getting one of these for every build. Plug the male end into a USB 3.0 port on the back of the server and feed the female end up to your work space for a super-convenient USB 3.0 port where you need it.

I hope these builds give you the confidence to build your own Hyper-V home lab server. I'm interested to hear your experiences in the comments section below. Happy building!
Read more ...